Patience and Savory Tartlets for Spring


Patience.
I’ve been thinking a lot about the nature of patience since a chance encounter with a stranger earlier this year. The unknown woman tapped me on the shoulder. When I turned to her, she said: I admire you for your patience. I am still amazed because at the time, I was feeling anything but patient. Out to dinner with my husband Al, daughter Isabel and my mother, Stella—I was feeling anxious to get home. We were in a Chinese restaurant on Long Island. It was the eve of our departure to the safety of New Hampshire.
My mother and I have a complex relationship. Love abounds between us but it rarely shows itself overtly. I get angry easily when I am with her, no doubt in part because I feel like I am a disappointment―I am not the dutiful Jewish daughter she’d hope I’d become. Still, there is love between us and I try hard to be there for her at this stage of her life. I want her to know my children.
As my mother approaches 90 years old, Isabel will turn 12. My daughter is becoming more independent, my mother is becoming more dependent. At dinner that night, as I spoon-fed my mother because her age-worn hands are no longer up to the task, I tried to bridge the gaps between youth and old age. Patiently, I asked my mother to tell us about her youth. As her story unfolded, I asked her to envision ‘little’ Stella, age 11— then tell her anything. It was awkward, my mother struggled to find what to say. After a pregnant pause the answer came: I would tell her, you had a good life. Stay true to yourself. It was a touching moment, one that the stranger at the next table overheard, one that I will carry with me as reminder in my life to stay true to myself, to remember to see the best in each day, in any given moment, no matter how challenging―practice patience.
What sorts of things are challenging for you? When do you find yourself needing the most patience in your life?
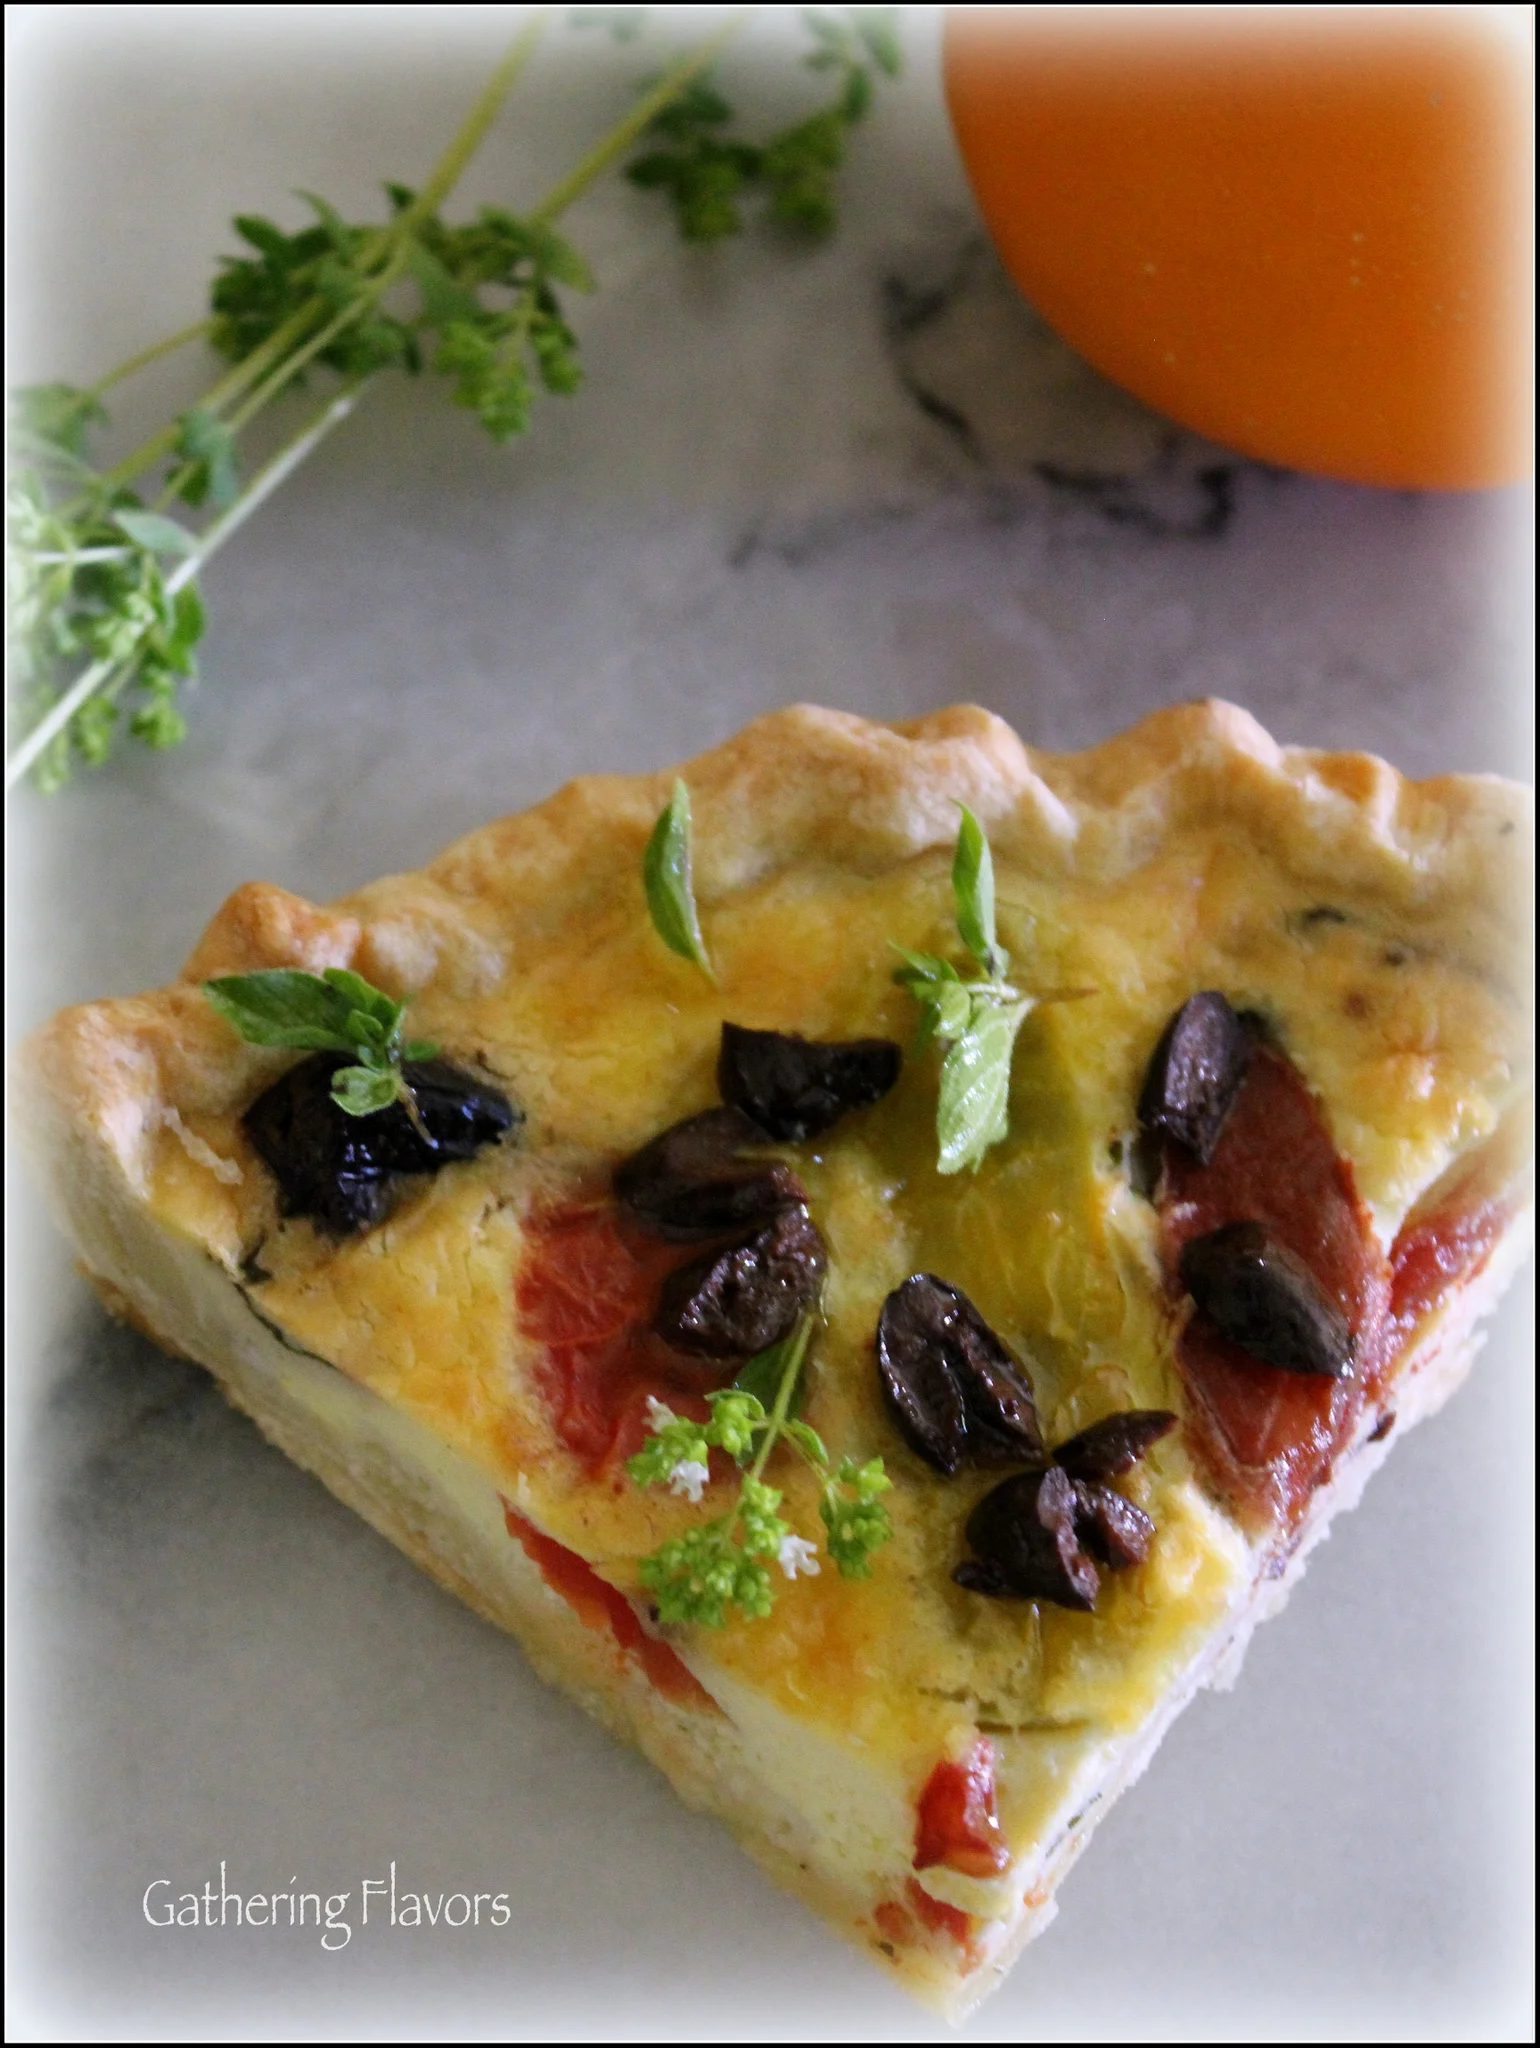
Here in New England patience becomes important at the end of a dark, long winter. Now that spring is here our patience will be rewarded with fresh produce growing in our gardens, at local Farmer’s Markets, or in our CSA baskets. Fresh foods taste oh-so-good with the simplest of preparations―Simple Roasted Asparagus or fresh fiddleheads boiled then sprinkled with melted butter―are amazing. But it also fun to dress them up with something fancier. These Spring Tartlets are perfect to have on hand throughout the growing season. Here, delicate butter pastry is filled with a bit of feta cheese and a light egg custard. The preparation requires patience—the dough needs to be carefully shaped and chilled between steps. Chilling the dough after you first mix it together, then again after you shape it into the tartlet, allows the gluten in the flour to contract so the baked shell will keep its shape. Baking chilled tart dough helps create a flaky, golden crust. Your patience will be rewarded with every bite of these delicious tartlets, so much so that you will want to keep some pre-baked shells in the freezer at all times―they are extremely versatile to fill with both savory and sweet fillings. (See a couple of suggestions at the end of the recipe.)
Happy Spring!
I look forward to seeing you in my kitchen, gathering flavors, soon.
Dena

SAVORY SPRING TARTS
Yield: 6 5-inch Tarts
Ingredients and equipment:
For the pastry shells:
Six 5-inch round tart pans with removable bottoms*
- 1 ½ cups all-purpose flour plus more for rolling out the dough
- ½ teaspoon salt
- 1 teaspoon granulated sugar
- 5 tablespoons unsalted butter, chilled and cut into small cubes
- 3 tablespoons solid vegetable shortening, chilled and cut into small cubes
- 2 tablespoons freshly squeezed lemon juice, chilled
- ¼ cup cold water, or more as needed
For the filling:
- 2 large eggs
- 1 cups whole milk
- Pinch cayenne
- Pinch salt
- ¼ pound soft white cheese, such as feta or goat, crumbled and at room temperature
For serving:
- 2 cups prepared vegetables, such as roasted asparagus, boiled fiddleheads, rinsed greens
Directions:
To make the tart shells:
- Sift the flour, salt and granulated sugar into a small mixing bowl. Add the butter and vegetable shortening. Using a pastry blender or two butter knives, cut the butter and shortening into the flour until the mixture resembles coarse cornmeal.
- Sprinkle on the lemon juice and a bit of the cold water. Using your hands, mix the liquids into the dry mixture, adding more water as needed to form a smooth dough. Form the dough into a ball, then flatten it into about a round disk. Wrap with plastic wrap and refrigerate for at least 2 hours.
- After 2 hours, line the tart pans with aluminum foil around the outside. Remove the dough from the refrigerator and cut it into 6 equal pieces. Place 5 of the pieces back in the refrigerator while you work. Lightly dust a work surface and roll out one piece of dough to about a 6-inch round disk. Gently place it in a tart pan, drape any excess dough over the edges then folding it back on itself to form the shape of a crust. Refrigerate. Repeat until you have filled all 6 tart pans. Refrigerate pastry shells for at least 2 hours or up to 8 hours.
- Preheat oven to 375 degrees F. Prick the pastry with a fork then line it with foil. Fill with beans, rice or pie weights to weigh down the crust as it is baking. Place in the oven and bake until the visible crust begins to become golden about 15 minutes. Remove the tart shells from the oven, carefully remove the weights and the inner foil, then return the tart shells to the oven. Bake until the bottoms are also golden, about another 5 minutes more. Remove from oven and allow to cool completely before filling.
To prepare the filling:
- Place all ingredients into a large measuring cup with a spout. Beat together with a wire whisk.
To assemble and bake the tartlets:
- Preheat oven to 350 degrees F.
- Place the baked tart shells, still in their aluminum foil wrapped pans, on a cookie sheet.
- Pour the prepared filling into the shells, dividing the filling evenly between the tart shells.
- Bake until the filling is cooked through and the top is puffed and golden, about 45 minutes.
- Remove from the oven. Allow to cool slightly before you remove the tartlets from their pans. Serve warm or at room temperature garnished with your favorite summer vegetables.
- Enjoy.
Notes:
- The tart dough can be made ahead of time and frozen for up to a month. Defrost it slightly in the refrigerator before rolling out.
- The baked shells can be made ahead of time and frozen in an airtight container for up to one month. Defrost before filling.
- These shells can also be filled with a sweet filling. Try spreading one tablespoon of raspberry jam in the bottom of each baked shell. Top with fresh berries and whipped cream. Or, fill them with vanilla ice cream and top with chocolate sauce.
- If you prefer to make one large tart instead of 6 smaller ones, roll out the dough to fit a 9-inch round pan. Bake the shell as described and fill. Plan on increased baking times at each step.

One Year Ago: The Colors of Spring (Recipe: Trail Mix Cookies)